WooCommerce
Connect a WooCommerce store as a source or as a sales channel with the Ecomiq plugin.
Connect your WooCommerce store with the Ecomiq plugin, without copying API keys. As a source, Ecomiq brings in your catalog and orders; as a sales channel, it publishes your products and receives the orders placed in WooCommerce.
How it works
- Source. Ecomiq reads your products with variants, categories, attributes, and images, plus stock and orders. Changes arrive through webhooks, and a periodic read covers anything that does not.
- Sales channel. Ecomiq publishes products from your catalog to WooCommerce, keeps price and stock up to date, and receives the orders. In a marketplace, an order with products from several sellers becomes one order per seller.
- One role per store. A WooCommerce store connects as a source or as a sales channel, not both.
- Its own key. The plugin creates a read and write API key for the user who approves. Reconnecting replaces it.
Requirements
- WordPress 6.5, WooCommerce 9.0, and PHP 7.4 or later.
- HTTPS and pretty permalinks: in Settings → Permalinks, any option except "Plain".
- A WordPress user who can manage WooCommerce.
- Access to the Ecomiq admin.
Install the plugin
Download ecomiq-for-woocommerce.zip. In WordPress, go to Plugins → Add New → Upload Plugin, upload it, and activate it. The plugin adds the WooCommerce → Ecomiq page.
The code is at github.com/ecomiq/ecomiq-woocommerce, under the GPL.
Connect from Ecomiq
- In the admin, open Channels → Add.
- Pick WooCommerce under To sell for a sales channel, or under To bring products for a source.
- Click Start, enter your store URL, and click Connect account.
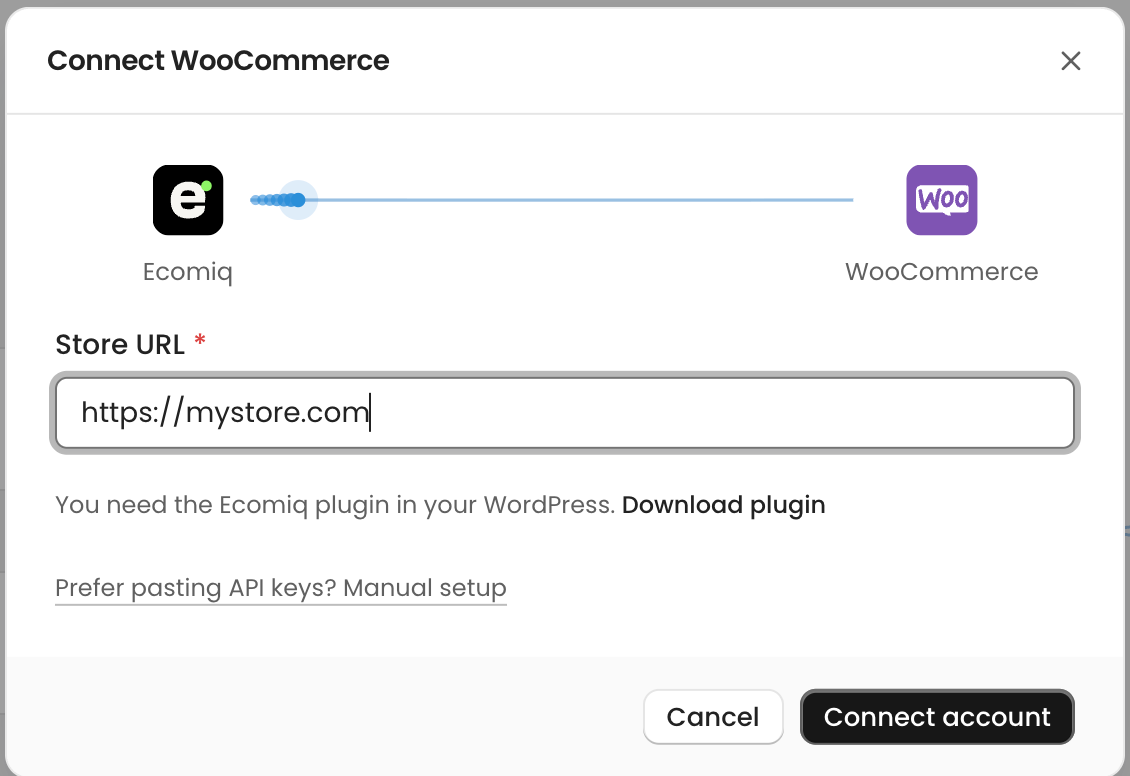
Ecomiq checks that the plugin answers and tells you if it isn't installed or the store blocks it.
Approve in WordPress
WordPress asks you to sign in and shows which Ecomiq store is asking for access and as which user. Click Approve and you are back in Ecomiq with the store connected.
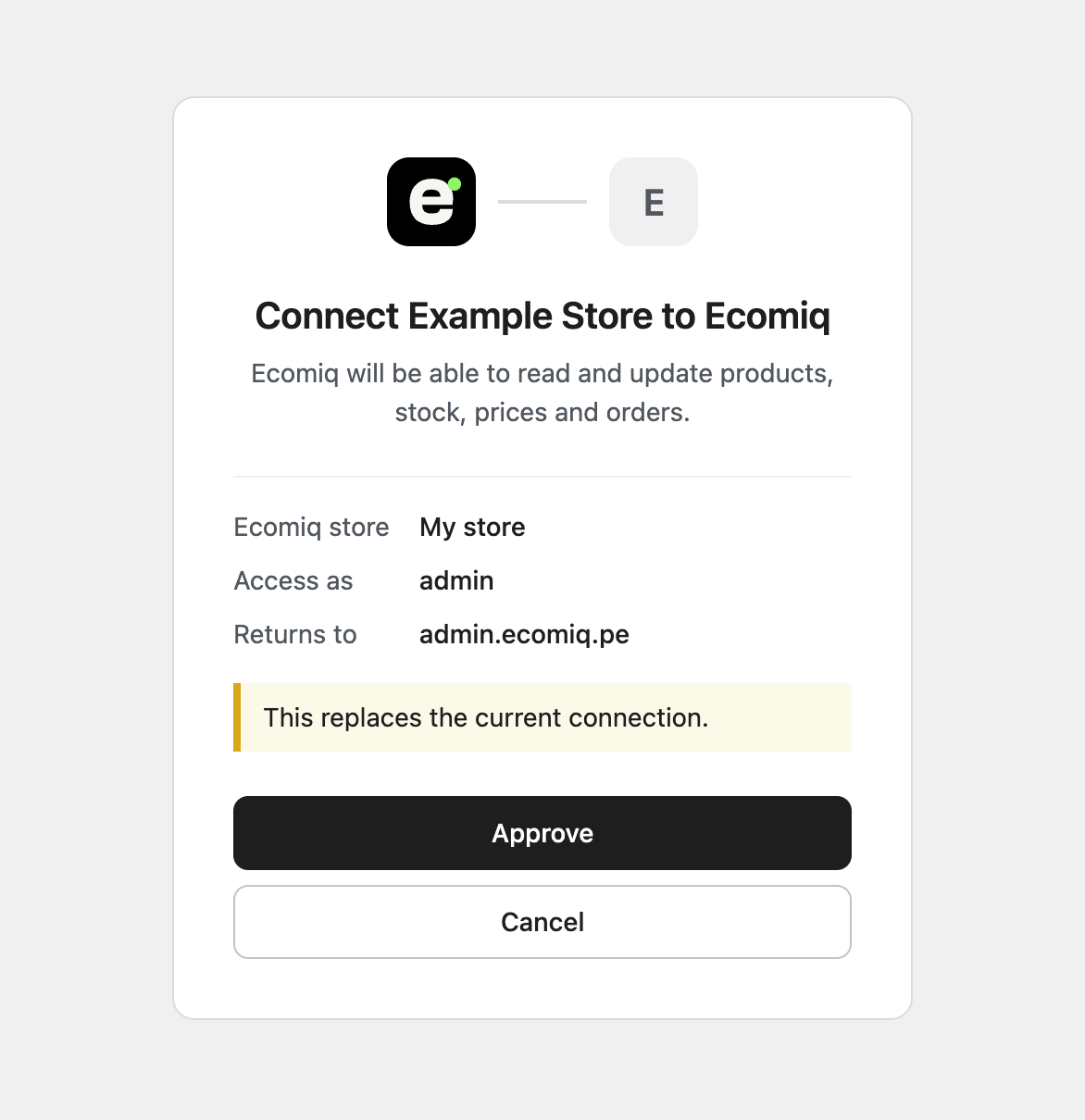
The code expires after 10 minutes
An approval works once. If you take longer, click Connect account again.
Finish the setup
Ecomiq tests each flow (products, price, stock, and orders) and shows the steps left:
- As a source. Review the products from the first read and approve them.
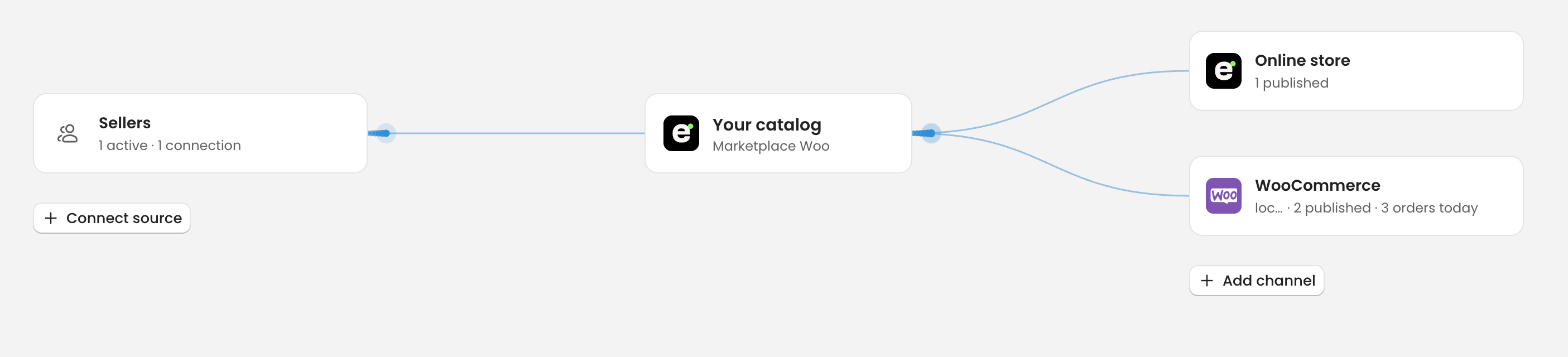
- As a sales channel. In Mappings, match your categories with the WooCommerce ones. Review the price, publish one test product, and then the rest.
Shipping
If your WooCommerce store is a sales channel, checkout can charge shipping with what you set up in Ecomiq: zones, each seller's rates, and quotes from your carriers.
- In WordPress, open WooCommerce → Settings → Shipping and edit the zone, for example "Peru".
- Choose Add shipping method and then Ecomiq.
- In Fallback rate, enter what to charge if Ecomiq doesn't answer. If you leave it empty, checkout offers no shipping in that case.
At checkout:
- A cart with products from several sellers shows one shipment per seller, each with its own options.
- The order reaches Ecomiq with the shipping the buyer chose and its carrier, ready to prepare the shipment.
- Products that don't come from Ecomiq use the zone's other methods.
WooCommerce doesn't ask for a district: in Ecomiq, set up zones by department.
Orders from other channels
If your WooCommerce store is a source and you sell one of its products on another channel, Ecomiq can create the order in your store so it takes the stock:
- Payment and shipping carry the name of the channel where it sold, such as "Shopify" or "Falabella". They never show at checkout and shipping is zero.
- The buyer gets no emails from your store; the channel where they bought already wrote to them.
- An order note says where it was sold and its number there.
Order statuses
In the channel, open the Statuses tab:
- When an order comes in. Which Ecomiq status matches each status of your store, including the ones other plugins add, such as "Shipped".
- When you change the order in Ecomiq. Which store status to use when the order moves to in progress, in transit, delivered, or cancelled.
Anything you don't choose follows the default shown on each row.
If an order comes in with a status Ecomiq doesn't recognize, it waits. The channel shows Unmapped statuses with the number of orders; once you pick that status in the tab, those orders come in on their own.
Diagnostics and activity
In WordPress, WooCommerce → Ecomiq shows two blocks:
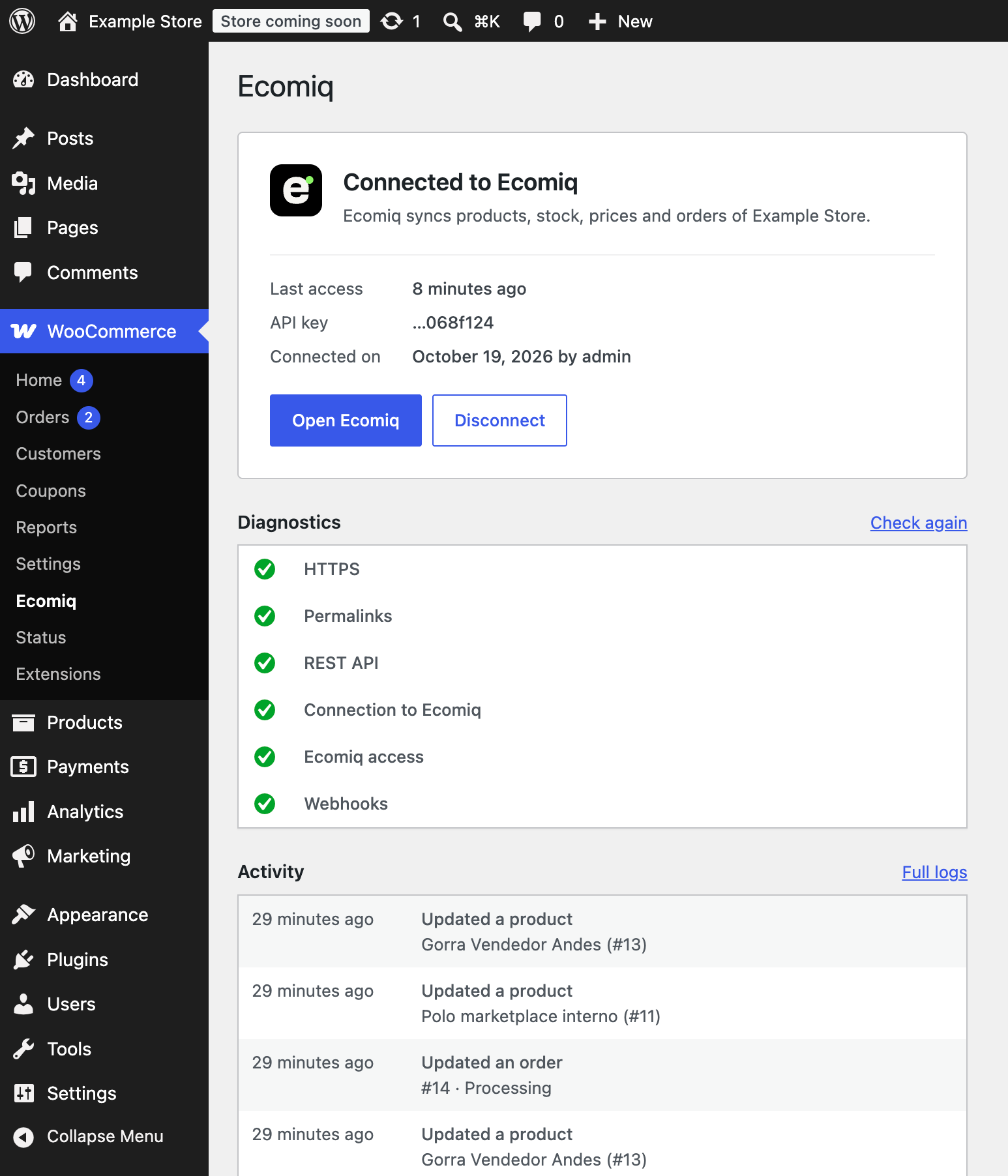
- Diagnostics. HTTPS, permalinks, the REST API, outbound access to Ecomiq, the last time Ecomiq called, and the webhooks. After a change, click Check again.
- Activity. The last 50 Ecomiq writes to products, stock, prices, and
orders, the requests that failed, and the webhooks that did not arrive. They
also go to WooCommerce → Status → Logs with the
ecomiqsource.
Firewalls and security plugins
Cloudflare, Wordfence, Sucuri, ModSecurity, and others can block Ecomiq. When that happens:
- While connecting, Ecomiq tells you which firewall answered instead of the store.
- In WordPress, the diagnostics name the active security plugin and where to allow Ecomiq.
Allow Ecomiq in that firewall and click Check again.
Disabled webhooks
WooCommerce disables a webhook after 5 failed deliveries in a row. The plugin turns the Ecomiq ones back on after 15 minutes and logs it in Activity. Ecomiq also reads the store periodically, so changes from that window are not lost.
Disconnect
In WooCommerce → Ecomiq, click Disconnect. This deletes the API key and the Ecomiq webhooks. Your products and orders stay as they are. Uninstalling the plugin also deletes its options.
Privacy
Ecomiq reads and updates products, stock, prices, and orders, including the name, email, phone, and addresses of the customer on each order. The plugin adds this text to the WordPress privacy policy guide. See the privacy policy.
Next steps
- Sellers: one order per seller in your marketplace.
- Order lifecycle: what happens to each order after it arrives.
- Events: receive orders in your system in real time.
Last updated: